
By now you’ve probably seen the Instagram update that allows you to include Instagram story highlights underneath the bio in your profile. Today, I want to show you exactly how to add a highlight to your profile and also how to brand them to your business!
Why should you create Instagram story highlights? Is there an advantage?
First of all, if you aren’t posting on Instagram stories already, YOU NEED TO BE! Video is king in the marketing world right now. Instagram stories are a great way to share valuable educational content with your followers, behind the scenes of what you do every day, fun videos from the “person behind the business,” and sooooo much more… but that’s another post for another day 🙂 Highlighted stories are THE way to share your favorite stories on Instagram for longer than 24 hours. They actually stay on your highlights for as long as you want them to! To get started, you’ll need to determine the categories you want to have for your Instagram story highlights.
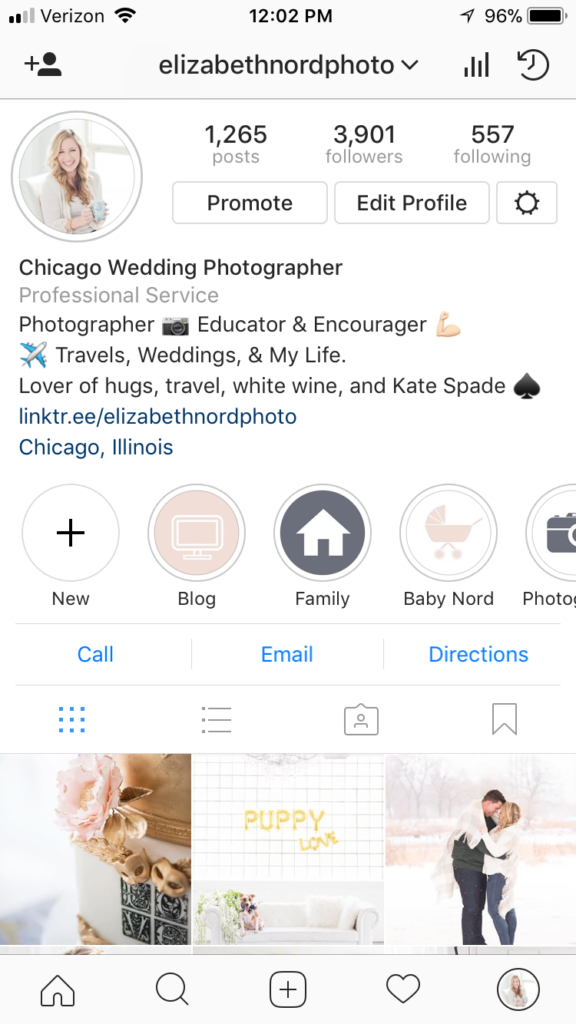
Ask yourself these questions: What do you share most of on your instagram stories? What fits with your brand and would be something your followers would want access to after the 24 hours they’re on stories? Personally, I created these stories: Weddings, Travel, Blog, Family, Baby Nord (because I’m expecting my first child this year!), Photography Tips, and Travel. Remember, you can always add and delete more if you’d like. You can create broad categories like I did, or more specific ones (i.e. for Katie and John’s wedding day, an industry event you went to, or your trip to the camera store).
How to create story highlights on your profile:
- Make sure your Instagram app is updated. If you still don’t see where you can create your highlights on your profile, delete the app and re-download. If it still doesn’t work, it’s possible that you don’t have the update just yet. But don’t worry…you will eventually!
- Go to your profile and click the “+ new” button underneath your bio.
- You should now see your archived stories pop up. They should do this by default (see photo below). To change this, go to your profile settings and open your story settings. Pick one of your chosen categories and start selecting each story that you’d like to highlight that falls under that category.
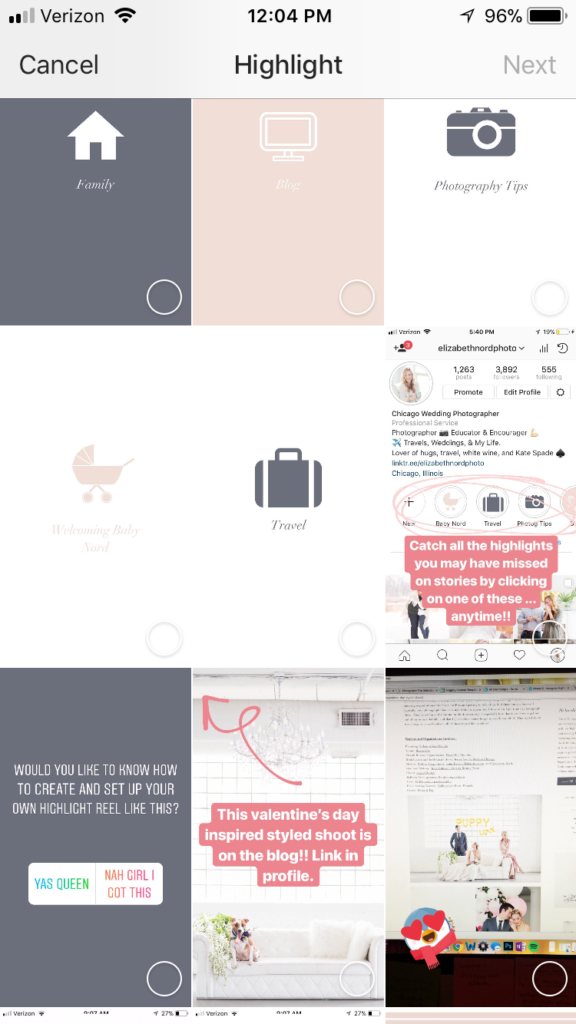
- Click next. Now you can edit your cover image and enter the highlight category that will be seen underneath the cover photo. Hint: you can pinch the cover image in or out on your iPhone in case you want it larger. I did this so that the suitcase was the only thing that was seen in the circle.

- Click add. You should now see the new stories highlight on your profile! YAY!!
Want to take it a step further and brand the highlights to your business instead of leaving them as random photos or screenshots of your stories (which is what happens if you haven’t already created graphics like I was showing above)? If you do, check out the step by step tutorial I have for you below or watch the video! Make the graphics all the same color, change up the colors (like I chose to do), or don’t even worry about this step. It’s up to you!
Steps To Branding Your Instagram Story Highlights:
- Go to www.canva.com and create a free account.
- Once you’ve done that, start your own template by clicking “use custom dimensions” in the upper right hand corner and enter the dimensions for an Instagram story (1080 x 1920).
- Now you can create your highlight to fit your brand!
- For a more in-depth tutorial on how to brand your highlight within Canva, check out the quick clip I created from my Instagram Stories below.
Tips to remember:
- You must post the Canva created images to your stories in order to add them to your highlights. You must also leave them up on your stories for the full 24 hours! If you delete them from your stories before the 24 hour time period, they will not be seen under your archived stories and you cannot use them in your highlights in the future.
- You can create a new highlight OR add to an existing highlight by tapping the heart in an active story on your Instagram.
- You can add up to 20 highlights, but only 4 can be seen at a time. Scroll to the left to see all of your highlights.
- You can edit your already create highlights by clicking and holding down on the highlight you wish to edit. Now you have the choice to either DELETE or EDIT your highlight. If you want to delete, click delete. If you want to edit, click edit and continue to the step 3. Here you can edit your cover image, rename your highlight, as well as select or deselect the stories you want in your highlighted section. You can choose more stories to add or delete ones you previous included from your archived stories. Click done when finished.
I hope you found this helpful as you create your own Instagram story highlights and make your personalized graphics on Canva! Comment below if you used this to create yours and include a link if you’d like so I can see them firsthand! Cheering for you always, friends!